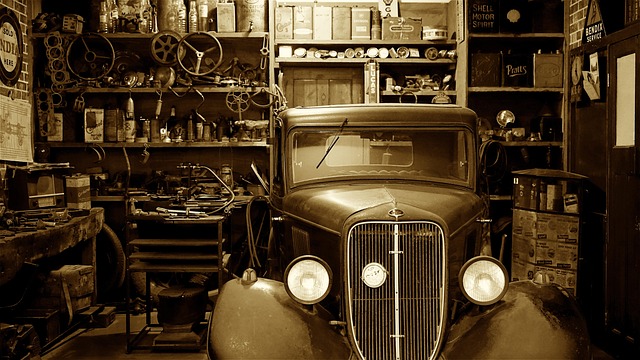
Before DIY radiator repairs, assess damage like leaks and corrosion. Gather tools and parts including hose, wrenches, funnel, safety gear. Prioritize safety by draining system, disconnecting battery, and elevating vehicle. Consider repair vs. replacement based on age, cost, and vehicle condition. Reassemble with care, following manufacturer instructions for seals and connections. Test thoroughly, checking for leaks and securing connections to ensure optimal performance. Regular maintenance and professional radiator repair service recommendations prevent costly issues.
Looking to fix your ailing radiator? DIY radiator repairs can save you money, but it’s crucial to follow best practices for safe and effective solutions. This comprehensive guide walks you through every step, from assessing damage and gathering tools to reassembling with care and testing performance. Learn the ins and outs of radiator repair service, ensuring your car stays cool and reliable.
- Assess the Damage: Spotting Common Radiator Issues
- Gather Tools and Parts: Essential Supplies for Repair
- Drain and Prepare: Safety First Before Disassembly
- Replace or Repair: Deciding on Component Maintenance
- Reassemble with Care: Correct Assembly Techniques
- Test and Adjust: Ensuring Optimal Performance After Repairs
Assess the Damage: Spotting Common Radiator Issues
Before attempting any DIY repairs, it’s crucial to assess the damage and identify common issues with your radiator. One of the most visible signs is a leak, which could indicate a cracked or damaged hose, cap, or even the radiator itself. If you notice fluid pooling under your car, especially during hot summer days when car overheating is more prevalent, it’s a clear indication that further investigation is needed. Another frequent problem is a loss of cooling performance, where your car struggles to maintain optimal temperatures, resulting in a car doesn’t cool down scenario. This could be due to obstructions in the radiator’s core or issues with the cooling fan.
Regularly checking for corrosion and rust buildup on the exterior and interior of the radiator is also essential expert advice on radiator repairs. These signs often point to underlying problems that require attention. By identifying these common issues early, you can prevent more serious radiator repair service needs and ensure your vehicle maintains optimal performance throughout its journey.
Gather Tools and Parts: Essential Supplies for Repair

Before tackling any DIY radiator repairs, it’s crucial to gather the right tools and parts. This ensures a successful and safe fix, saving you the cost of a professional radiator repair service. Essential supplies include a new radiator hose (for replacements or fixes like a burst radiator hose), wrenches for your vehicle’s specific size, a funnel, and a container for old coolant. Don’t forget safety gear: gloves to protect your hands from hot components and goggles to shield your eyes from any splashes. Additionally, have a set of pliers on hand for tightening connections. With these essentials, you’ll be well-prepared to handle common radiator maintenance tips and minor repairs.
Drain and Prepare: Safety First Before Disassembly

Before tackling any DIY radiator repairs, safety should always be your top priority. The first step in the process is to thoroughly drain and prepare the system. This involves disconnecting the battery, engaging the parking brake, and elevating the vehicle on jack stands for added stability.
Ensure proper ventilation in the work area as you’ll be dealing with potentially hazardous fluids. Put on protective gear, including gloves, safety glasses, and long-sleeved clothing to guard against hot components and any potential leaks. Remember, an expert radiator repairman recommends these precautions to mitigate risks associated with working on a vehicle’s cooling system, which could include problems like overheating or leaks that compromise the efficiency of your vehicle’s cooling system.
Replace or Repair: Deciding on Component Maintenance

When considering DIY radiator repairs, one of the first decisions you’ll face is whether to replace or repair damaged components. This choice significantly impacts both cost and long-term functionality. In many cases, especially with newer radiators, repairing can be a viable option, as it involves replacing individual parts rather than the entire unit. This not only saves on costs but also ensures your vehicle’s cooling system remains in top condition. A professional radiator repair service will assess the damage, offer recommendations, and provide options for both replacement and repair, considering factors like part age, cost, and your vehicle’s make and model.
Opting for repairs can extend the life of your radiator and avoid unnecessary environmental waste by reducing the need for frequent replacements. However, if components are severely damaged or outdated, replacing the entire radiator might be more practical and cost-effective in the long run. Regular cooling system maintenance plays a crucial role here, as it helps identify issues early on, making repairs more accessible and affordable. A reliable radiator repair guarantee can also offer peace of mind, ensuring that any unforeseen problems are covered, thereby promoting both safety and efficiency for your vehicle’s cooling system.
Reassemble with Care: Correct Assembly Techniques

When reassembling your radiator after DIY repairs, it’s crucial to employ meticulous care and precise techniques for a successful outcome. Start by ensuring all components are properly aligned and fit together securely. Use the correct tools, such as wrenches or screwdrivers, tailored to the job to avoid damaging any parts. Verify that all connections are tight but not overly tightened, as this can cause damage. The order of assembly should be logical, following the manufacturer’s guidelines if available.
Pay close attention to any seals or gaskets, ensuring they are seated correctly and properly lubricated where necessary. A leak-free joint is paramount for a functioning radiator repair service. Remember, auto radiator specialists often emphasize the importance of clean, precise work during reassembly, which can prevent future issues like unexpected radiator leaks. Consider these steps as your guide to achieving a durable, efficient, and cost-effective cheap radiator fix.
Test and Adjust: Ensuring Optimal Performance After Repairs
After completing the repair or replacement, it’s crucial to test and adjust your radiator system for optimal performance. Start by checking the radiator overflow tank for any leaks, ensuring all connections are secure, and the level is correct. A simple water test can help identify any persistent issues. Next, verify that the radiator cap is properly seated, as this plays a vital role in maintaining pressure and preventing excessive heat.
Safe radiator removal and subsequent reassembly require careful attention. Follow recommended guidelines for your vehicle’s make and model to ensure efficient cooling and avoid further damage. Regularly monitoring temperature levels during and after repairs guarantees the system functions as intended, enhancing the overall reliability of your vehicle and saving you from potential costly radiator repair services in the future.
When undertaking DIY radiator repairs, adhering to these best practices ensures a safe and effective outcome. From assessing damage to proper reassembly and testing, each step is crucial in maintaining your vehicle’s heating system. While this guide offers valuable insights, for complex or undiagnosed issues, consider seeking assistance from a professional radiator repair service. With the right tools, knowledge, and safety precautions, you can effectively manage common radiator problems, extending the life of your vehicle’s vital heating component.