Before DIY shower projects, assess space and gather materials including base, walls, head, curtain rod, hooks, caulk, and water filter. Focus on waterproofing for safety and stall longevity. Understand shower systems' options and impacts on costs. Set the shower base precisely using level tools and adjust as needed. For tile, prepare subfloor, mark out shower area, and cut trim accurately. Connect hot/cold water lines securely with expert help. Seal gaps around perimeter with high-quality caulk for watertightness. Final touches include securing door seals and drain assemblies. Test connections and drains for leaks after completion. Enjoy your new spa-like sanctuary.
“Transform your bathroom with a DIY shower installation—a rewarding project for any homeowner. Before you begin, assess your space, gather the right materials, and consult shower installation experts for guidance. This step-by-step guide covers everything from installing waterproofing, setting the base, tiling, connecting plumbing, sealing gaps, to final touches. By following these expert tips, you’ll have a safe, stunning shower tailored to your space.”
- Assess Shower Space and Gather Materials
- Install Waterproofing: A Critical Step
- Set Shower Base and Ensure Leveling
- Tile Installation: Techniques and Safety
- Connect Plumbing: Hot and Cold Water Lines
- Seal Gaps, Caulk, and Final Touches
- Test and Enjoy Your DIY Shower Creation
Assess Shower Space and Gather Materials
Before starting any DIY shower project, it’s crucial to assess your shower space and gather the necessary materials. Measuring the dimensions of your existing shower stall or bath area is the first step. Take note of the size, including the length, width, and height, as these will guide your purchase decisions for the new shower components. A shower installation expert would recommend checking for any structural issues or unique challenges specific to your space, ensuring a safe and secure fit.
Once you have accurate measurements, create a list of required materials. This typically includes a new shower base or pan, walls, and a head. Consider options like seamless shower floor installations for a modern, low-maintenance look. Additionally, think about essential accessories such as a shower curtain rod, hooks, and a water-resistant caulk to complete your bathroom remodeling with showers project. Following detailed shower filter installation instructions can also enhance both functionality and water quality.
Install Waterproofing: A Critical Step
When installing a new shower, one of the most critical steps is proper waterproofing. This is not just a recommendation; it’s an essential safety measure to prevent water damage and ensure your shower remains functional for years to come. A shower installation expert knows that using high-quality waterproof membranes and applying them correctly is paramount. These membranes create a protective barrier between the shower stall and the rest of your bathroom, halting moisture from seeping into walls and floors.
Remember, not all shower wall panel systems are created equal. When planning your DIY shower installation, consider both the aesthetics and functionality of various options available. Understanding the shower installation cost breakdown can help you make informed decisions, ensuring a safe and satisfying bathroom renovation experience. For instance, while some materials might be more expensive upfront, their longevity and water resistance could save you money in the long run by reducing potential repair costs associated with poor waterproofing.
Set Shower Base and Ensure Leveling

When installing a new shower, one of the most crucial steps is setting the shower base and ensuring it’s perfectly level. This process requires precision and attention to detail. Start by carefully unboxing your shower base and examining its components. Make sure all parts are included and in good condition. Next, position the base in the designated shower area, ensuring it fits snugly against the existing walls or floor. Use a level tool to check if the base is flat; any imperfections can lead to water drainage issues later on. If adjustments are needed, use shims or adjust the feet of the base until it’s perfectly level. This step is vital for a successful shower installation and will set the foundation for the entire shower system, including your chosen shower wall panel systems.
A shower installation expert knows that taking the time to get this initial step right can save future headaches. Not only does leveling ensure optimal water drainage, but it also guarantees that your shower system design and fit are up to standard. So, whether you’re considering a DIY project or hiring a plumber Bromsgrove for assistance, don’t skip this critical phase in your shower installation process.
Tile Installation: Techniques and Safety

When it comes to DIY shower installation, tile is a popular choice due to its durability and aesthetic appeal. However, proper techniques are essential for a safe and long-lasting result. A shower installation expert recommends starting with preparing the subfloor, ensuring it’s level and secure. This step is crucial as it provides a solid foundation for your tiles, preventing future issues like uneven tiling or loose spots.
Next, marking out the shower area accurately is key. Using a level, create guidelines for where the shower walls will be installed. This ensures precise cutting of materials like tile trim and the accurate placement of fixtures. Remember, proper measurements and cuts are vital to avoid costly mistakes. For instance, replacing a shower pan or repairing a shower drain assembly requires precise fitting, making expert knowledge beneficial to ensure water tight seals and prevent leaks that could damage your home over time.
Connect Plumbing: Hot and Cold Water Lines
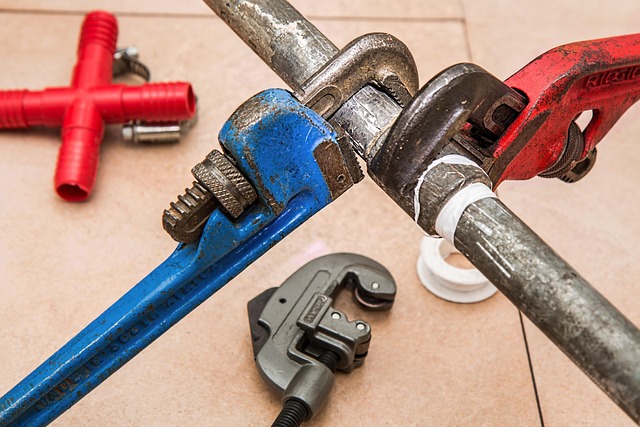
Connecting the hot and cold water lines is a crucial step in any DIY shower installation project. As a shower installation expert, it’s essential to understand that these lines are the lifeblood of your new shower, delivering the perfect balance of hot and cold water for an enjoyable experience. Before proceeding, ensure that you have turned off the main water supply valve to prevent any accidents or flooding during the process.
Properly connecting these pipes involves using the right fittings and tools. The hot water line should be securely attached to the shower’s heating element or thermostatic valve, ensuring a reliable connection for consistent water temperature. Similarly, the cold water line connects to the appropriate valve, allowing for precise control of the cold water flow. Remember, a meticulous job here can significantly impact the overall performance and longevity of your new shower, so take your time and double-check each connection before moving on to the next step.
Seal Gaps, Caulk, and Final Touches

After successfully installing your new shower enclosure, the next crucial step is to ensure a watertight seal around the perimeter. This involves applying caulk along any gaps or joints where the shower meets the wall. A quality caulk designed for bathroom use will create an effective barrier against water seepage, ensuring your newly installed shower remains secure and dry.
Paying attention to detail here is key; ensure you fill all gaps evenly with caulk, creating a smooth, seamless finish. This is where a shower installation expert’s touch can be invaluable—they’ll know the best types of caulk to use and how to apply it for maximum protection. Final touches include securing any loose components, such as shower door seals or replacing worn-out shower drain assemblies, ensuring your shower not only looks great but functions flawlessly for years to come.
Test and Enjoy Your DIY Shower Creation
After successfully installing your DIY shower, it’s time to test and enjoy your creation! Before stepping into your new shower, ensure all components are securely fastened and sealed. Check for any leaks at the joints and around the shower head. Fill up the shower with water to simulate normal use and examine how the drain functions. Remember, a professional plumber in Bromsgrove can provide valuable shower base leveling tips if needed, ensuring your DIY project is as safe and functional as possible.
Once you’re satisfied everything is in order, it’s time to relax and savor your handiwork. Enjoy the soothing experience of your freshly installed shower, knowing that your shower installation expert skills have created a space where you can unwind and rejuvenate.
Creating your own DIY shower is a rewarding project that allows you to design a space tailored to your preferences. By following these comprehensive steps, from assessing your shower space to sealing gaps and caulk, you can ensure a safe and beautiful installation. Remember, while this guide provides valuable insights, consulting a shower installation expert for specific challenges or unique layouts is always an option. With the right tools, materials, and knowledge, you can transform your bathroom into a relaxing oasis on a budget. Enjoy your newly created shower sanctuary!