
Smart thermostat installation offers hassle-free setup and energy savings with remote access via smartphone apps. DIY models from providers like Nest and Ecobee simplify the process, guiding users through installation in simple steps. Selection involves assessing needs, setting a budget, researching connectivity, compatibility, and features. Precise measurement and careful wiring ensure optimal efficiency. Post-installation, maximize benefits through learning preferences, firmware updates, remote control, scheduling, and expert support for best results.
Looking to enhance your home’s energy efficiency with a smart thermostat? This guide demystifies the process, offering a comprehensive review of top models designed for straightforward DIY installation. From understanding essential smart thermostat basics to navigating the selection and setup processes, we provide a step-by-step approach. Discover benefits and tips for optimal performance post-installation, making your smart thermostat not just an upgrade but a game-changer in home comfort and energy savings.
- Understanding Smart Thermostat Basics for Easy Installation
- Top Models for Straightforward DIY Installation
- Step-by-Step Guide: Selecting Your Ideal Smart Thermostat
- Installation Process: Unboxing to Final Setup
- Benefits and Tips for Optimal Smart Thermostat Performance Post-Installation
Understanding Smart Thermostat Basics for Easy Installation
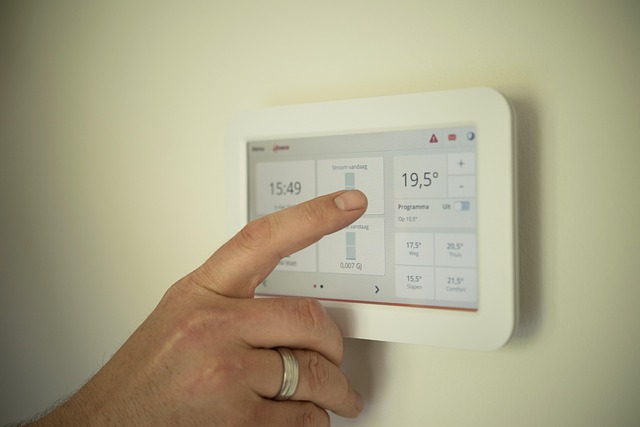
Understanding the fundamentals of a smart thermostat is key to achieving hassle-free installation and optimal energy savings. Unlike traditional thermostats, these modern devices offer advanced temperature control capabilities through connectivity to your home’s WiFi network. This allows for remote access and adjustments via smartphone apps, providing convenience and enhanced efficiency.
Smart thermostat installation involves integrating the device into your heating, ventilation, and air conditioning (HVAC) system. Many models offer plug-and-play setups, making the process accessible for DIY enthusiasts. By learning the basics of smart thermostat configuration, users can enjoy precise temperature control, customized scheduling, and ultimately, reduce utility bills with smart temperature management—all while potentially tapping into the do-it-yourself (DIY) trend in smart home device setup. For those unfamiliar or requiring assistance, local smart home setup specialists are readily available to ensure a seamless installation process.
Top Models for Straightforward DIY Installation

When it comes to installing a smart thermostat yourself, several top models stand out for their straightforward DIY approach. Trusted smart thermostat providers like Nest and Ecobee offer intuitive installation processes, often guided by smartphone apps. These devices typically require just a few simple steps, including mounting the thermostat on your wall, connecting it to your WiFi network, and following in-app instructions to link it with your heating and cooling system – no complicated wiring or boiler repair needed.
For those looking for affordable smart home automation options, models like the Honeywell Home T9 or the TP-Link KAS120 offer excellent value without sacrificing functionality. These thermostats are designed with ease of use in mind, making them suitable even for tech-newbies. With clear instructions and user-friendly interfaces, installing these devices is a breeze, allowing you to start enjoying energy savings and smart control of your home climate right away.
Step-by-Step Guide: Selecting Your Ideal Smart Thermostat
Selecting the perfect smart thermostat is a breeze if you follow a few simple steps. First, evaluate your specific needs – consider factors like the size and layout of your apartment, energy efficiency goals, and budget. A smart thermostat for an apartment, for instance, might focus on compact design and wireless installation guide for hassle-free setup.
Next, research different models, focusing on features that matter most to you. Look into connectivity options – Wi-Fi or Bluetooth? Compatibility with your existing HVAC system is crucial. Also, consider additional perks like voice control integration, energy usage reports, and scheduling capabilities. The ideal time for smart home upgrades is when you’re already making changes or during seasonal transitions to maximize savings.
Installation Process: Unboxing to Final Setup

Unboxing your new smart thermostat is just the first step in transforming your home’s temperature control. The installation process involves several straightforward yet important stages to ensure optimal performance and seamless integration into your connected home environment.
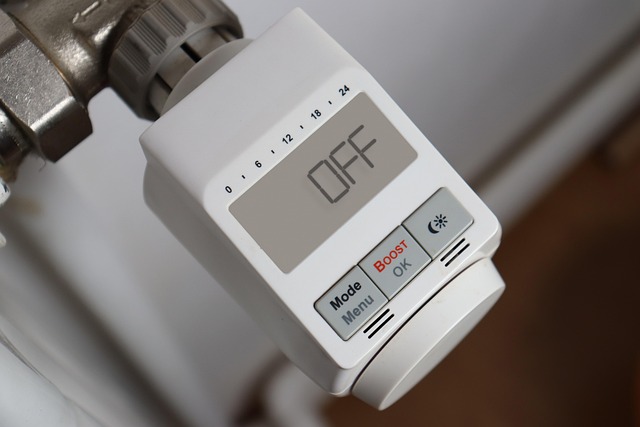
Starting with the hardware, carefully lay out all components to familiarize yourself with each part. Most smart thermostats come with detailed instructions and all necessary tools for a successful DIY installation. Follow these step-by-step guides, ensuring precise measurements are taken to fit the thermostat securely in your wall or existing control panel. The process includes disconnecting old wiring, installing new brackets, and carefully positioning the device while ensuring proper electrical connections for optimal energy-efficient heating and cooling.
Benefits and Tips for Optimal Smart Thermostat Performance Post-Installation

After successfully installing your new smart thermostat, maximising its potential is key to enjoying its numerous benefits. One of the primary advantages is its ability to learn and adapt to your preferences over time, creating a comfortable environment while saving energy. To ensure optimal performance, regularly update the thermostat’s firmware, as these updates often include enhancements and bug fixes.
Additionally, take advantage of the smart thermostat’s connectivity to control temperature settings remotely via a compatible app or voice assistant. This allows you to adjust the temperature before arriving home or while away, contributing to further energy savings. Tips for efficient use include setting realistic schedules, as even minor adjustments can make a difference. Remember that a plumber Bromsgrove professional can offer guidance on optimal placement and provide support if any issues arise during or after installation, ensuring your smart thermostat functions at its best.
Choosing the right smart thermostat is a game-changer in making your home comfortable and energy-efficient. With the right model, installation can be a straightforward DIY process, saving you time and money. Our guide has walked you through understanding the basics, selecting the top models, and setting up your ideal smart thermostat. Now, with a few simple steps and some expert tips, you’re ready to unlock the benefits of a smarter, more efficient home. Enjoy the convenience and peace of mind that comes with easy smart thermostat installation!